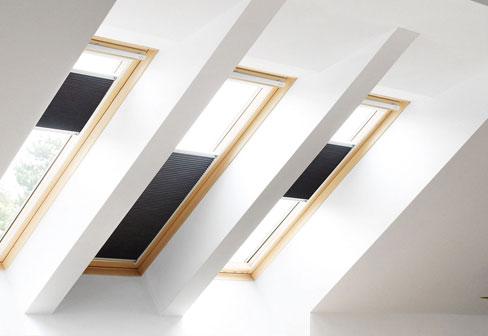
Windows give your house a beautiful look. Centuries ago, the buildings constructed had holes in the walls; these holes would let the air pass through, and later on, the residents of the place would place something to block water or any harsh weather. Then residents started putting curtains and pieces of wood to close and open those holes. Slowly they evolved into the shape of the windows we see today.
Windows are pretty sturdy. Most of them last many years, and you don’t have to replace them every now and then, like many other home essentials. Nonetheless, while they may last years, they can’t last a lifetime. So, today we will be looking at steps and ways to repair home windows, and yes, it is a DIY home windows repair project. But before we move onto the step-by-step guide, let’s tackle a few questions first.
When do your windows need repair?
You need to make sure that your windows can be repaired at home and do not need entire replacing. Nonetheless, in both cases, you need to check first. Whether the window sash is broken or is it leaking water? Is it letting air pass through, or is it simply hard to open? Sometimes all you need is a home remedy to fix slight issues you have on your hand. For example, a little lubricant can help with squeaking.
Why do it yourself?
We only recommend repairing it yourself if it’s not a big issue. If it’s something out of your league, it is better to call an expert. Some of the reasons why you should do it yourself are:-
- Helps save cost: Repairing a window yourself can help save the costs of calling a professional, especially now when all the help you need is just one click away.
- A fun project: Repairing the windows of your house can be a fun summer project to do with your teens in your garage. It’ll lighten the mood, give an activity to everyone and fix your old wooden windows.
- Learning: It is essential to keep learning in your life; it is never too old to learn how to use a drill or punch in a nail. This little project can be the start you need.
How to repair a wooden window
Now, since you know that you can do the task yourself and why you are doing it, we can get down to business. Repairing isn’t going to take long, but you have to be patient with your work to get quality results. Furthermore, since this could be your first ever DIY, don’t desire perfection.
1, Prep your window for repair
Before you do anything to repair your window, you need to prepare it for the repair; this means pre-treating it if required. First, you need to remove the window frame from its place. Afterward, it would help if you inspected it. If the wood of the structure is in good condition, you don’t need to do anything. But if you inspect anything that shows that there is damage done to the wood, you may need to remove the bit and get a new wooden piece.
2, Sand the wooden frame
After you have inspected the pane and checked any deterioration, you can move on to the next step, sanding the wooden pane. To do anything on a wooden surface, you need to sand it down first. You can use a sanding machine if you have one or know how to use one, or grab a sanding paper and sand the window panes yourself. Your goal is to get it nice and smooth. After sanding it, dust it with a piece of cloth.
3, Prime it for the next step
After you have successfully sanded your windows frame, it would help if you primed it. Of course, you have to prime all the wood, but be careful not to prime the sides. The sides need to stay as they are for the next step.
4, Some more sanding, if needed.
After priming the surface, you can send it again; this will get the surface smooth gain. After sanding:
- Remove all the dust by using a vacuum or a piece of cloth.
- Check if any spots need priming, if the sanding removed them.
- If so, take a little bit of primer and prime that area again.
5. Bed the pane
Next, you have to bed the pane. For that, take some putty and warm it up by rolling it in your hand. The heat from the palm should be enough, then place the putty on all sides of the sash. Make sure to separate all pieces before this and lay them somewhere you don’t forget their order. You can mark them with colorful tape to keep in mind which part goes where.
6. Choose and select the points to glaze
Set the glazing points; you should select one place per side on small panes. For larger frames, set them away from the corners.
7. Distribute the putty
Now, grab more putty and go around the window with it. It doesn’t need to be very neat at first. You can roll the putty in the form of snakes and then press it down; that will take longer. Then use the “in line” technique to give a neater look
8. Polish the pane and clean the thing up
Afterwards it would help if you polished the exterior of the pane, followed by sweeping and cleaning it up. Make sure to have a mask on at all times to protect your nose and mouth from dust; wear gloves and glasses too for extra protection.
9. Remove excess putty
At this point, you need to flip the window. Use a small knife used for this purpose to remove and trim off any excess putty.
10. Clean and polish again
You would need to clean and polish the pane once again, the insides this time. Afterward, give the putty time to set in.
11. Priming is key
You can prime the putty again if there is a need. Not all paint or putty combinations require priming anyway.
12. Painting
After fixing the entire wooden sash and reattaching everything, it’s time to paint the wood. You can choose any color you like; make sure that it matches the theme and the color palette that runs through the house too, you don’t want to ruin the home’s aesthetic appeal.
If your DIY project was not successful enough you can always invite home window repair service like GoodWindowsWorks.
Happy Repairing!


