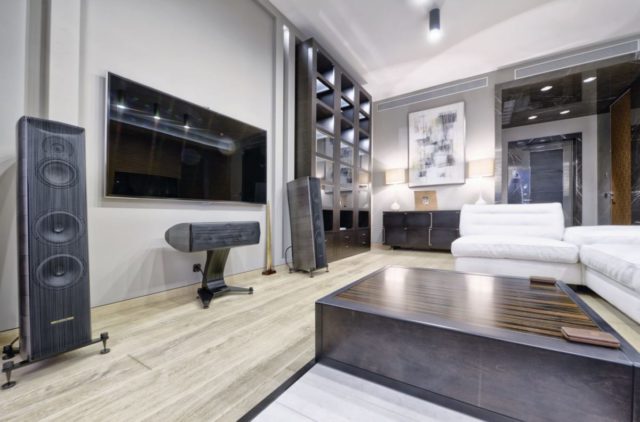
Installing a home audiovisual (AV) system may seem daunting, but with some basic knowledge, you can set up one that meets your needs. This beginner’s guide covers planning, purchasing, and installing home AV equipment.
1. Select The Right Equipment
First, select the right equipment for your setup.
- Identify Your Needs: The first step is deciding what your system wants to do. Will you use it for watching movies, listening to music, gaming, or all three? This will determine the core components you need. For movies and TV, a television and speakers are a must. For music, speakers and an AV receiver to power them are essential. And for gaming, you’ll want low input lag screens and surround sound. Research thoroughly to find devices that suit your budget and offer the features you desire for an immersive home AV experience.
- Purchase Your Gear: When buying gear, stick with reliable brands known for quality. For TVs, consider LG, Samsung, and Sony. Bose, Klipsch, and Definitive Technology are excellent options for surround speakers and subs. And for AV receivers, Denon, Onkyo, Yamaha, and Marantz are leaders. Meanwhile, if you want to leverage the power of smart systems but don’t know where to start, you can always hire home AV installation experts specializing in these technologies to make sure components are attuned to one another.
Pro Tip: To futureproof your system, buy 4K HDR TVs, Dolby Atmos receivers, and speakers with the widest frequency range. High-speed HDMI cables are a must for 4K video signals. And for the best audio quality, use wired connections over wireless. An acoustic transparent screen lets sound pass through it cleanly.
2. Get Started
Now that you’ve gathered your equipment, we’re almost ready to start the home AV installation process.
- Choose Your Location: Home theaters are often in basements or dedicated rooms. But living room setups work, too. Remember that the arrangement should accommodate the wiring necessary for connectivity while maintaining a visually appealing setup.
- Get An AV Rack: Begin by locating a centralized area for your AV components, such as a media console or AV rack. This helps streamline connectivity and minimizes the clutter of cables, creating a cleaner look for your home entertainment space.
3. The Fun Part: Installation And Setup
Now, it’s time to roll.
- Unbox And Install AV Components: Carefully unpack each component and read the accompanying manuals to familiarize yourself with the devices. Take note of the specific input and output ports, as understanding these will be crucial for proper connectivity during the home AV installation process.
- Connect Using Appropriate Cables: Next, connect your home AV components using high-quality HDMI, audio, and power cables. Please pay attention to cable management, securing them along walls or using cable organizers to prevent tangling and maintain a neat appearance. Connect everything to the receiver following its manual.
- Mind The Placements: Position the TV so it doesn’t create annoying reflections. In terms of speakers, place front left, center, and right at ear level and surrounds to the sides and rear. Subwoofers go wherever they fit.
Pro Tip: Proper installation of the speakers improves sound quality. Wall mount them at ear level using brackets or stands. Elevated surrounds send sound over listener’s heads, so aim them downwards.
4. Audio System Calibration
Use the calibration tools provided by your AV receiver to fine-tune the audio settings based on your room’s acoustics. This ensures the sound is balanced and tailored to your home AV installation. Consult the user manual for speaker placement recommendations to achieve optimal sound distribution.
5. Visual Display Calibration
For an enhanced viewing experience, calibrate your TV or projector settings. This includes adjusting brightness, contrast, color balance, and other parameters for accurate and vibrant visuals. Most modern TVs offer built-in calibration tools, but you can also use external calibration devices for a more precise setup.
Pro Tip: Consider professional installation if you’re uncomfortable tackling wiring, carpentry, or calibration. Experts can neatly hide wires, cut holes, and ensure components work optimally together. Pros can also recommend the right equipment combos for your room and budget.
6. Testing And Troubleshooting
Once all connections are in place and settings are adjusted, it’s time to test your home AV system. Play different types of media – movies, music, and games – to ensure that both the audio and visual components work harmoniously.
If you encounter any issues during testing, refer to the troubleshooting sections of your device manuals or online resources. Common problems include loose connections, incorrect settings, or incompatible cables.
7. Regular Upkeep
Ongoing maintenance keeps your system running well. Periodically check for software updates on gear. Keep ports, vents, and fans clear of dust buildup. Clean discs and media to prevent skipping or freezing. Replace worn parts like remotes and HDMI cables. And recalibrate if the sound seems “off” over time.
Pro Tip: Thoughtful planning is key to a home AV installation that matches your needs and budget. Research the latest gear, but don’t overbuy just for bells and whistles you won’t use. Think about future expansion possibilities, too. Allow ample setup time and seek help for tricky tasks. With smart preparation, your system can thrive for years, delivering audiovisual bliss.
Final Thoughts
Learning home AV basics helps ensure an immersive entertainment experience. Plan priorities, buy quality components that fit your space, install them neatly, and maintain the system over time. Follow these tips and enjoy stellar sight and sound without break-the-bank prices.


